
Build your own 100% private and secure AI chat interface with Docker and Traefik

Written by Henry Navarro
Introduction 🎯
Imagine having your own ChatGPT-like interface that’s 100% private, secure, and costs practically nothing to run. Today I want to show you how to create your own production-ready AI chat interface with enterprise-grade HTTPS security.
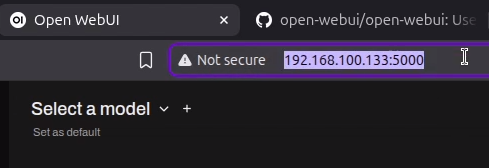
Most people deploy Open WebUI and get stuck with that dreaded “Not Secure” warning in their browser, a clear sign that their communications are running over HTTP instead of HTTPS. This means your conversations could potentially be intercepted by anyone between your device and the server. Not exactly what you want when handling sensitive data with AI models.
In this comprehensive guide, I’ll walk you through the exact process I use to deploy PrivateGPT, a fully secured Open WebUI instance that you can test right now. Every message you send will be completely encrypted until it reaches the server, and the total cost for this demo? Just one cent per hour.
What is Open WebUI? 🌐
Open WebUI is an open-source interface designed to let you deploy and chat with your own models locally. Think of it as your personal ChatGPT that runs entirely on your infrastructure. The interface allows you to interact with various AI models in a familiar chat format, giving you complete control over your data and conversations.
However, there’s a significant problem with the default installation. When you deploy Open WebUI out of the box, you’ll notice something concerning: your browser displays a “Not Secure” warning. This happens because the application runs over HTTP instead of HTTPS.
The Security Problem: HTTP vs HTTPS 🔒
When you see that “Not Secure” warning, it means your communications are vulnerable. Here’s what’s happening:
HTTP (Insecure):
- Data transmitted in plain text.
- Can be intercepted by hackers during transmission.
- No encryption between your browser and server.
- Browsers flag it as unsafe.
HTTPS (Secure):
- All communications are encrypted end-to-end.
- Impossible for hackers to intercept and read your data.
- Verified secure connection with SSL certificates.
- Enterprise appearance for production use like PrivateGPT.
The difference is crucial when you’re sending sensitive prompts or working with confidential information through your AI interface.
What You’ll Need to Get Started 🛠️
To transform your basic Open WebUI deployment into a production-ready, HTTPS-secured interface, you’ll need two essential components:
1. A Domain Name 🌐 You’ll need your own domain to enable HTTPS encryption. The good news? This doesn’t have to be expensive. You can get a domain for as little as €1 per year from providers like IONOS.
For example, if you want to create something like my-interface-openwebui123.com, you can easily check availability and purchase it through domain registrars. I have a referral link for IONOS that can give you up to €150 in discounts.
2. A Server or VPS with Open Ports 💻 You’ll need a server that allows you to open ports so external users can access your Open WebUI application. If you don’t have your own server, you can rent one at a very affordable price.
I personally use Hetzner for this purpose, their prices are practically unbeatable. You have two main tasks before we begin:
- Purchase your domain from a provider like IONOS
- Set up a cloud server with a provider like Hetzner (or any other you prefer)
Setting Up Your Hetzner Server 🖥️
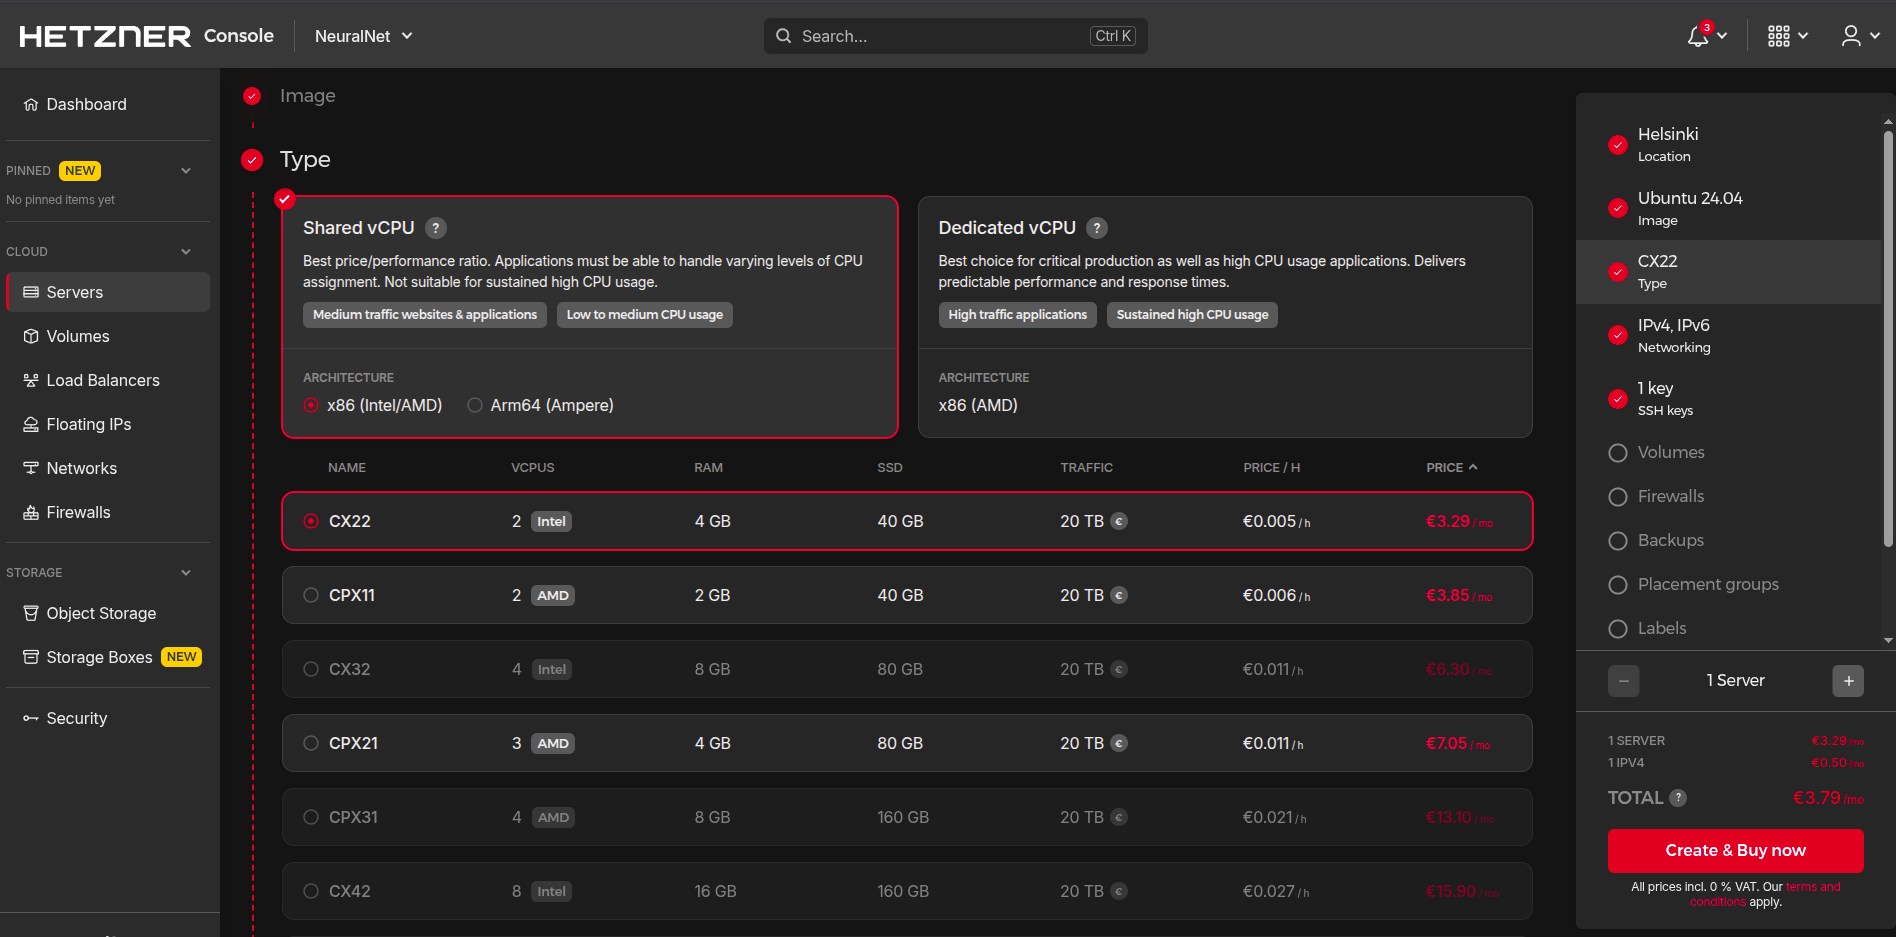
Once you’re registered with Hetzner (I’m already a long-time client), creating an instance is straightforward. Let me show you the exact configuration:
Server Configuration:
- Location: I prefer Germany since I’m in Europe, but choose the closest to your location
- Type: Shared vCPU (you’ll be sharing resources with others, but it’s sufficient for this solution)
- Instance Size: The smallest instance at €3.29 per month is perfect for this deployment
- Capacity: Can handle around 10 users comfortably – ideal for families or small teams
The shared vCPU option is cost-effective because you’re not paying for dedicated resources, yet it provides everything needed to run a secure Open WebUI instance for personal or small business use.
Once you follow Hetzner’s setup instructions and click “Create and Purchase,” the server creation process takes just a few minutes. Make sure to save the IP address – you’ll need it for the next step.
Configuring Your Domain DNS Settings 🌐
Once your server is created, you’ll need to save the IP address because we’re going to use it to configure the domain we purchased from a provider like IONOS.
Step 1: Access Your Domain DNS Settings Most domain providers have similar interfaces. In your domain management panel, look for the DNS settings section. Here’s what you need to do:
- Navigate to the DNS section of your domain provider
- Add a new A Record that assigns an IPv4 address to your domain or subdomain
- This process is straightforward across most hosting and domain interfaces
Step 2: Create Your Subdomain
For this tutorial, I’m going to create a subdomain called chat. So when someone visits chat.yourdomain.com, it should point to the IP address of our Hetzner server.
DNS Configuration:
- Record Type: A Record (IPv4 address)
- Subdomain: chat
- Points to: Your server’s IP address (the one you saved from Hetzner)

Simply save this configuration, and the DNS changes may take a few minutes to propagate across the internet.
Connecting to Your Server 💻
While the DNS is propagating, let’s connect to our Hetzner server. Open a terminal and use SSH to connect:
ssh root@YOUR_SERVER_IPWhen prompted about adding the host to your known hosts list, type yes and press enter. Voilà! You’re now inside the server instance we created on Hetzner – it’s that fast and simple.

What’s Next? Now that we have:
- ✅ A domain configured to point to our server
- ✅ SSH access to our server instance
We’re ready to start deploying the actual application with proper HTTPS security. The next steps will involve cloning the repository and setting up Docker containers for both the reverse proxy and Open WebUI itself.
Cloning the Repository and Installing Docker 📦
Now that we’re connected to our server, it’s time to get the application code and prepare our environment.
Step 1: Clone the Repository The next step is to clone the repository that will allow us to deploy this 100% secure Open WebUI application:
git clone https://github.com/NeuralNet-Hub/open-webui-https.gitThis repository belongs to my company, NeuralNet, and contains all the necessary configuration files to deploy Open WebUI with HTTPS security.
Step 2: Install Docker Here’s an important detail: the Ubuntu server we created comes practically empty – we need to install Docker to run our containerized applications.
I’ve included a convenient installation script in the repository to make this process simple:
cd open-webui-https
bash install-docker.sh
This script will take a few seconds to complete. If everything goes well, you’ll see logs including a “Hello from Docker” message – this is essentially a Docker “Hello World” that confirms the installation was successful.
Setting Up the HTTPS Proxy with Traefik 🔒
Now we’re going to deploy the container that will handle our HTTPS encryption. We’ll use Traefik, an open-source reverse proxy that’s very popular for this type of setup.
Step 1: Configure Environment Variables
First, we need to review the configuration file I’ve provided: .env-dist
The most important setting you need to change is your email address:
# Copy the example environment file
cp .env-dist .env

# Edit the file with your email
nano .env
You can put any email address, nothing bad will happen if you use a placeholder, but it’s recommended to use your real email if you’re planning a long-term deployment.
Step 2: Deploy the Traefik Container Once you’ve configured your email, deploy the proxy container:
docker compose -f proxy-compose.yml up -d --force-recreateThis container isn’t very heavy, so it should download and start in just a few seconds.
What Traefik Does:
- Automatically generates SSL certificates
- Handles HTTPS termination
- Routes traffic to your Open WebUI container
- Manages certificate renewal automatically
With Traefik running, we’re now ready to deploy the actual Open WebUI application.
Deploying Open WebUI with HTTPS 🚀
Now we’re going to deploy the actual Open WebUI application that will work seamlessly with our Traefik proxy.
Step 1: Configure Open WebUI Environment Variables Open WebUI also has an example environment file with variables we need to configure:
# Copy the Open WebUI environment template
cp open-webui/.env-dist open-webui/.env

# Edit the configuration
nano open-webui/.env
Critical Configuration Change: The most important value you need to modify is the subdomain setting. You need to change it to match the domain configuration we set up earlier:
# Change this line to your domain
OPEN_WEBUI_HOST=chat.yourdomain.com
In my case, I use chat.henrynavarro.dev for my testing environment, but yours should be chat.yourdomain.com (replacing “yourdomain.com” with whatever domain you purchased).
Step 2: Deploy Open WebUI Once you’ve configured your domain, deploy the Open WebUI container:
docker compose -f open-webui-compose.yml up -d --force-recreate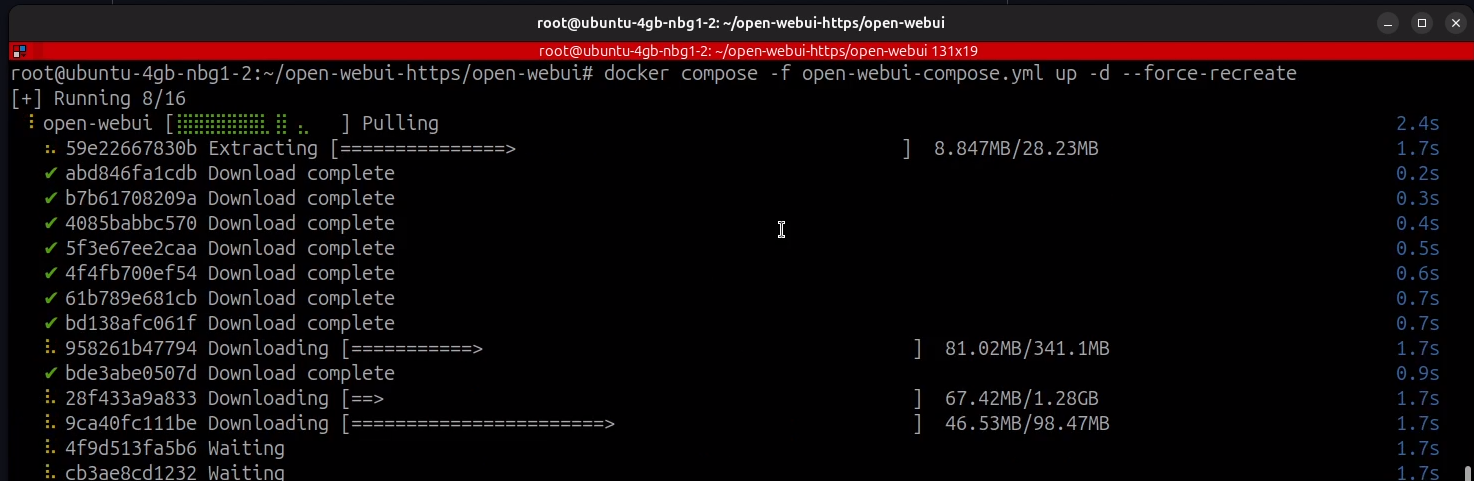
Important Note: This deployment will take longer than the Traefik container because the Open WebUI Docker image is much heavier. It’s not excessively large, but it will take a few minutes to download and start.
Monitoring the Deployment 📊
While the container is downloading and starting up, you can monitor the progress:
Check Running Containers:
docker psMonitor Open WebUI Logs:
docker logs -f openwebuiYou’ll see logs showing the docker is building the application. The container needs to fully initialize before it’s ready to accept connections.
Pro Tip: I recommend testing your deployment in a private/incognito browser window the first time. This ensures you’re getting a fresh connection without any cached data that might interfere with the HTTPS setup.
Once the logs show that Open WebUI has fully started (not just downloaded), you can test your deployment:
- Open a private/incognito browser window
- Navigate to
https://chat.yourdomain.com(replace with your actual domain) - You should see the Open WebUI interface without any security warnings

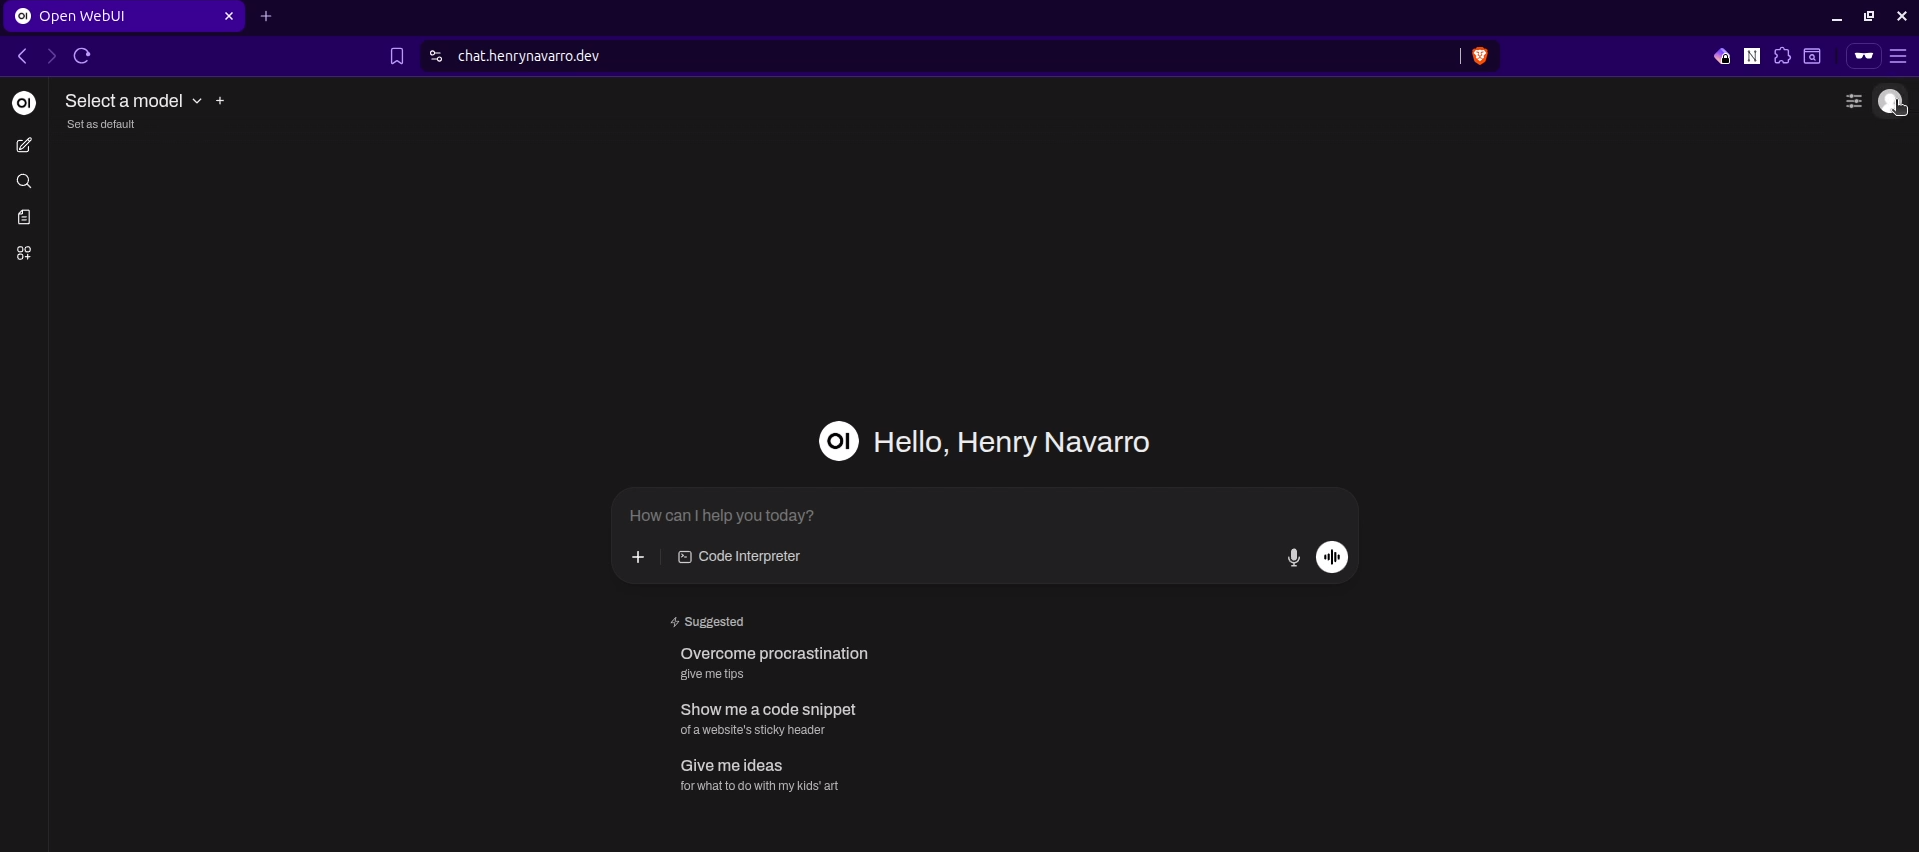
If everything is configured correctly, you’ll see the clean Open WebUI login screen with a proper HTTPS connection – no more “Not Secure” warnings!
Your Secure Open WebUI is Ready! 🎉
Congratulations! You now have your own ChatGPT-like interface running with full HTTPS security. When you visit your domain, you’ll see the Open WebUI registration screen.
Important: The first person to register will automatically become the administrator, so make sure you’re the first one to sign up!
Registration Steps:
- Enter your name.
- Provide your email address.
- Create a strong password.
Once registered, you’re inside your own private, secure Open WebUI instance running over HTTPS. All your communications are now completely encrypted from your browser to the server.
Need Professional AI Deployment for Your Business? 🏢
While this tutorial shows you how to deploy Open WebUI manually, many businesses need something more robust and enterprise-ready. That’s exactly the problem we solve at NeuralNet Solutions.
Why Choose Professional Deployment? The setup we’ve covered today is perfect for personal use or small teams, but enterprise deployments require additional considerations:
- Advanced Security: Multi-layer security, user authentication, and audit trails
- Scalability: Handle hundreds of concurrent users without performance degradation
- Integration: Connect with your existing business systems and workflows
- Compliance: Meet industry standards for data privacy and security
- Support: 24/7 monitoring and technical support when you need it
Introducing PrivateGPT by NeuralNet 🚀
Our flagship solution, PrivateGPT, transforms the basic Open WebUI setup into an enterprise-grade AI platform:
✅ Production-Ready: Fully configured HTTPS, load balancing, and automatic scaling
✅ Multi-Model Support: Works with OpenAI, Anthropic, local models, and custom APIs
✅ Document Intelligence: Advanced RAG capabilities for your company documents
✅ Team Management: Role-based access, usage analytics, and admin controls
✅ White-Label: Fully customizable interface with your company branding
📅 Book Your Free Consultation – No sales pressure, just honest advice about whether AI deployment makes sense for your business.
Conclusion 🏁
You now have your own 100% private, secure ChatGPT interface running for practically nothing. No more “Not Secure” warnings, no more worrying about data privacy, and complete control over your AI conversations.
Support this content: If you liked this post, you can support me here ☕😃
Keywords: Open WebUI HTTPS, secure Open WebUI deployment, private ChatGPT alternative, Open WebUI Docker, Traefik reverse proxy, HTTPS deployment tutorial, secure AI chat interface, self-hosted ChatGPT, Open WebUI SSL, private AI deployment